

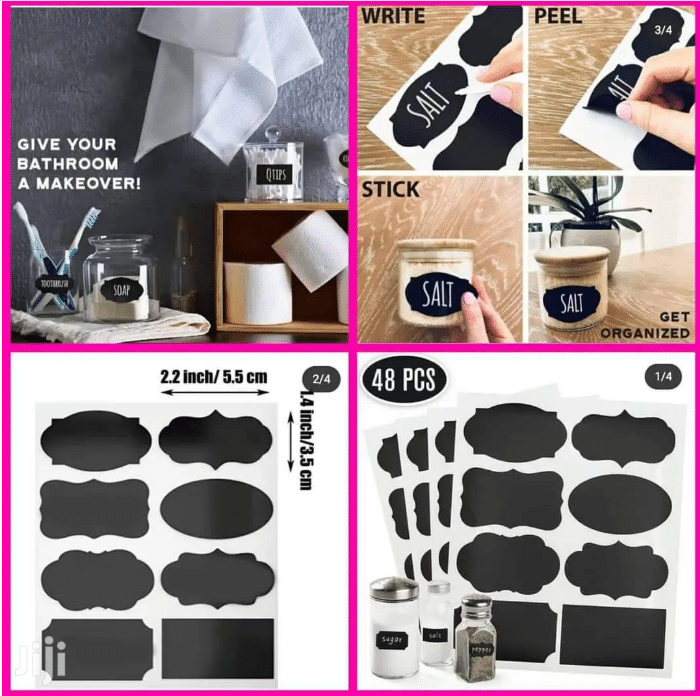
Stickers are one of the simplest and most flexible printed products around. A small business can use them to brand packaging, seal delivery bags and label jars of homemade produce. Schools and event organisers use them for name tags and promotions. And plenty of people simply enjoy decorating laptops, water bottles and notebooks with designs that reflect their personality.
Because stickers are so common, it is easy to assume they are all the same. In reality, the material, finish, adhesive and cut all affect how a sticker looks, how long it lasts and whether it suits the job. This guide walks through the options so you can order or choose stickers with confidence.
Why stickers matter for small businesses
For a growing brand, a well-designed sticker can do a surprising amount of work. A logo seal on a paper bag makes a plain package look finished. A clear ingredient label on a jar of honey or a bottle of juice builds trust. A sticker slipped into an order encourages customers to show off the brand. Across Kenya, many small producers, boutiques, bakeries and online sellers rely on stickers precisely because they are affordable to produce in small runs and easy to apply by hand.
Before placing an order, it helps to see what is already available and compare current offers on materials, sizes and quantities. Browsing ready-made and custom stickers from different printers and sellers gives you a feel for what finishes are on offer and which suppliers can handle the size of run you need.
Common uses for stickers
- Product labels for jars, bottles, cosmetics, candles and packaged foods
- Logo stickers for branding boxes, bags and envelopes
- Packaging seals that close a bag or box and show if it has been opened
- Car and window decals for shopfronts, vehicles and office glass
- Laptop and bottle stickers for personal expression or merchandise
- Wall stickers for decorating bedrooms, nurseries, classrooms and offices
- Event and promotional stickers for launches, campaigns, conferences and giveaways
- Organisational labels for files, shelves, stock and equipment
Sticker materials
Paper
Paper stickers are the most economical option and print beautifully. They are well suited to indoor product labels, envelope seals and short-term promotions. Their weakness is moisture: uncoated paper can smudge, wrinkle or tear if it gets wet, so it is not ideal for bottles that go in the fridge or items handled often.
Vinyl
Vinyl is a flexible plastic material that resists water, tearing and fading far better than paper. It is the usual choice for laptop stickers, bottle labels, outdoor signage and vehicle decals. Vinyl costs more than paper but lasts considerably longer.
Clear
Clear stickers use a transparent base, so only the printed design shows. They look especially smart on glass jars, bottles and windows. Keep in mind that light colours may appear faint on a clear base unless the printer adds a white underlayer behind the artwork.
Holographic and specialty
Holographic stickers have a shimmering, rainbow-like surface that catches the light. They are popular for merchandise, gifts and premium packaging. Metallic gold and silver materials create a similar high-end effect.
Reflective
Reflective material bounces light back towards its source, making it highly visible at night when caught by headlights. It is often used for safety markings, bicycles, helmets and some vehicle applications.
Finishes: gloss, matte and laminated
- Gloss gives vibrant, shiny colours that stand out, but can show glare under strong light.
- Matte has a soft, non-reflective look that feels modern and is easier to read in bright conditions.
- Laminated stickers have an extra protective film over the print. Lamination improves resistance to scratches, water and fading, and is worth choosing for anything that will be handled a lot or used outdoors.
Shapes and formats
How a sticker is cut affects both its look and how easy it is to use:
- Die-cut stickers are cut through both the sticker and the backing paper into a custom shape that follows the design outline. They look polished and are popular for logos and merchandise.
- Kiss-cut stickers are cut through the sticker layer only, leaving the backing intact. This makes them easy to peel and allows several designs on one sheet.
- Sheets hold multiple stickers and suit small quantities, hand application and giveaways.
- Roll labels come wound on a roll, which speeds up application for businesses labelling many products and works with label dispensers and applicators.
Simple shapes such as circles, squares and rectangles are generally quicker to produce than complex custom outlines.
Outdoor durability and waterproofing
If stickers will face rain, sun, washing or refrigeration, material choice becomes critical. Look for vinyl with a laminate or UV-resistant coating, and ask the printer whether the inks are suitable for outdoor use. Strong sunlight can fade colours over time, so outdoor stickers benefit from extra protection. For labels on chilled drinks or bathroom products, choose water-resistant materials and an adhesive designed for damp conditions.
Design tips for great-looking stickers
- Use high-resolution artwork. Images should generally be at least 300 dots per inch at the final print size. Vector files are ideal for logos because they scale without losing sharpness.
- Add bleed. Extend the background slightly beyond the cut line, often by a couple of millimetres, so that no thin white edge appears if the cut shifts slightly.
- Keep important content inside a safe zone away from the edge so text is not trimmed.
- Work in CMYK colour mode. Printers use cyan, magenta, yellow and black inks. Designs made in RGB for screens can look different when printed, so convert early and check colours.
- Prioritise readability. Use clear fonts, strong contrast and a sensible minimum text size, especially on small product labels.
- Keep it simple. A sticker is often seen at a glance. One strong image and a few words usually work better than a crowded layout.
For food and cosmetic labels, check what information you are required to show, such as ingredients, batch details or expiry dates, and leave enough space for it.
Ordering printed stickers
- Ask for a proof. A digital or printed proof lets you check spelling, colours, size and cut lines before the full run. Read every word carefully.
- Consider a sample run. For a new product label, a small test batch shows how the sticker looks and performs in real use.
- Think about quantities. Larger runs usually lower the cost per sticker, but only order what you can realistically use before a design or regulation changes.
- Confirm specifications in writing: material, finish, size, cut type, quantity and delivery timeline.
Buying tips: quality and avoiding disappointment
When comparing sellers, ask to see photos of previous work or a physical sample. Check that colours are crisp, cuts are clean and the adhesive holds well. Be cautious of designs that use other brands’ logos or copyrighted characters; these may infringe someone else’s rights, and a reputable business should avoid them. For vehicle decals, confirm that the material is designed for vehicle use so it does not damage paintwork when removed.
How to apply stickers neatly
- Clean the surface with a mild cleaner and let it dry completely. Dust and grease weaken adhesion.
- Apply at room temperature where possible; very cold or hot surfaces can affect the adhesive.
- Peel back part of the backing, position the sticker, then smooth outward from the centre.
- Use a card or squeegee to push out air bubbles for larger decals.
- For big wall or window decals, the hinge method helps: tape the decal in place along one edge, then peel and apply one half at a time.
Care, storage and removal
Store unused stickers flat in a cool, dry place away from direct sunlight, and keep them in their packaging so the backing does not curl or collect dust. Very old stock may lose some stickiness.
To remove a sticker without leaving residue, warm it gently with a hairdryer to soften the adhesive, then peel slowly at a low angle. Any leftover glue can usually be lifted with a little cooking oil or a suitable adhesive remover, followed by soapy water. Test any remover on a hidden area first, especially on painted walls and car paint.
Vehicle decals: check the rules
Rules for vehicle graphics vary from place to place. Before applying large decals, especially on windscreens or windows, check the relevant traffic regulations and any requirements that apply to your vehicle type, and make sure nothing obstructs the driver’s view, lights or number plates.
The bottom line
The right sticker depends on where it will go and how long it needs to last. Choose paper for affordable indoor labels, vinyl for durability, clear or holographic for visual impact and reflective for visibility. Add lamination for anything outdoors or frequently handled, prepare high-resolution CMYK artwork with bleed, and always approve a proof before a full print run.
