

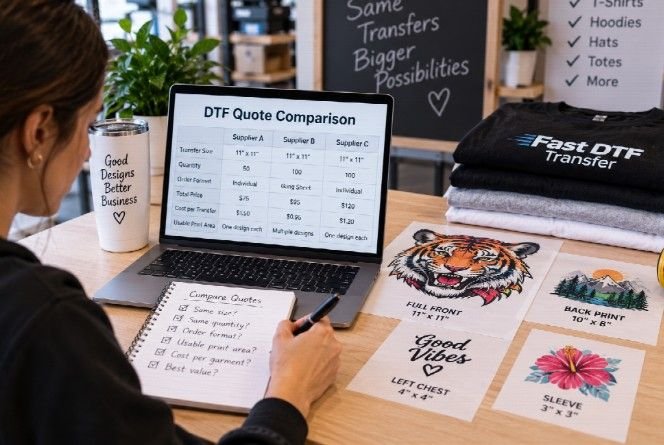
Searching for cheap DTF transfers sounds straightforward: compare prices and choose the lowest one. In practice, that approach can lead to a bad comparison because two DTF quotes may appear similar while covering completely different transfer sizes, quantities, or ordering formats.
A lower price only means something when you know exactly what you are receiving for it. Before choosing between suppliers or order options, normalize the comparison. Look at transfer dimensions, total quantity, usable print area, artwork count, and the format in which the transfers are being ordered.
If your goal is to reduce production cost without creating confusion, start by comparing equivalent cheap DTF transfers rather than simply comparing the largest number printed next to a discount or promotion.
Start With the Actual Transfer Size
Size is one of the easiest variables to overlook when comparing DTF prices.
A small left-chest transfer and a large full-front transfer are not equivalent products. Even if both are described as one transfer, the amount of printed material involved is very different.
Before comparing quotes, write down the exact dimensions required for each design. Then make sure every option you are evaluating is based on approximately the same finished transfer size.
This is especially important when one seller organizes pricing by individual dimensions while another uses broader size categories. Comparing the order total without checking dimensions can make one option appear cheaper simply because the transfers are smaller.
Compare Quantity at the Design Level
Next, confirm how many transfers you actually need.
A quote for 100 copies of one design is different from an order containing 100 transfers divided across ten designs. Artwork variation may change the way an order needs to be organized even when the total number of transfers is identical.
Create a simple quantity list before shopping:
- Design A: 40 transfers
- Design B: 30 transfers
- Design C: 20 transfers
- Design D: 10 transfers
Now you have a clear 100-transfer requirement instead of a vague request for “around 100 prints.”
This makes it easier to compare suppliers and also helps prevent overordering one design while underordering another.
Do Not Compare Only the Final Order Total
The total price at checkout is useful, but it does not tell the entire story.
Imagine two orders with different totals. The cheaper order may include fewer transfers, smaller dimensions, or less usable printed area. The more expensive order may actually produce more finished garments.
A better comparison asks: How much usable production output am I getting?
For individual transfers, you can compare price against the number of correctly sized prints. For layouts containing multiple graphics, compare the total number of usable designs that can be produced from the sheet.
Understand Transfers by Size
Ordering transfers individually by size can make comparison relatively simple because each design has a defined dimension.
If you already know that you need a specific number of front prints, sleeve logos, or smaller chest graphics, a size-based workflow lets you calculate quantities directly.
You can review DTF transfers by size when this type of ordering structure fits the job.
The important step is keeping the dimensions consistent throughout your comparison. A quote based on one size should not be compared directly with another based on a substantially different size.
Gang Sheets Change the Comparison
Gang sheets require a different way of thinking about cost.
Instead of focusing only on the price of one individual transfer, you are working with a larger printable area that can contain several designs. The value therefore depends partly on how efficiently that area is used.
If large empty spaces remain between graphics, the nominal sheet price may look attractive while the usable output is relatively low.
When evaluating a gang sheet, count how many finished transfers the layout produces. Then compare that output with what the same job would require when ordered individually.
The cheapest order format is therefore not automatically the format with the lowest visible starting price. It is the format that makes sense for your specific combination of designs, sizes, and quantities.
Watch for Mixed Sizes
Mixed-size orders deserve extra attention because they can distort simple per-transfer calculations.
Suppose an apparel order includes large back graphics, medium front graphics, and small sleeve logos. Dividing the order total by the total number of transfers gives you an average cost, but that average hides the fact that the transfers use very different amounts of print area.
Instead, separate the order into size groups first.
- Large graphics
- Medium graphics
- Small logos or identifiers
Compare each group independently before looking at the combined order.
Calculate Cost Per Finished Garment
For apparel sellers, the most useful number is often not cost per transfer. It is transfer cost per finished garment.
If a shirt uses only one front transfer, the calculation is simple. If it uses a front logo, back design, and sleeve mark, all three transfers contribute to the decoration cost of that garment.
Grouping transfer costs by finished product provides a clearer view of what your actual production requires.
This is especially useful when comparing several decoration concepts before deciding which one to sell.
Separate Cheap From Good Value
“Cheap” and “good value” are not always the same thing.
A useful quote comparison should tell you whether you are receiving the correct sizes, the quantities you need, and an order format that matches your production workflow.
If an inexpensive option creates excess transfers you will never use, forces inefficient layouts, or does not match your actual dimensions, the lower headline price may not represent the lower production cost.
Use the Same Checklist for Every Quote
Before making a final decision, compare every option using the same questions:
- Are the transfer dimensions equivalent?
- Are the quantities equivalent?
- How many different designs are included?
- Is the order based on individual sizes or a gang sheet?
- How much of the ordered print area will actually be used?
- How many finished garments can the order support?
Once these variables are aligned, comparing cheap DTF transfers becomes much more meaningful.
The objective is not simply to find the smallest number on the screen. It is to identify the ordering method that delivers the production output you need without paying for unnecessary sizes, quantities, or unused print area.
